How to add new shine to your used headlights and flashlights
With normal use of your car, the exterior is vulnerable to visible wear and tear, even if you are a very careful driver of your property. The years go by and the paint becomes less alive, the tires wear out little by little and the headlights lose a lot of their shine. But there are some features that can be used to smooth the weather and even fully recover the appearance of some items in your car. In the case of headlights and lanterns, for example, the solutions are simple. Would you like to know how?
The bad consequences of having worn headlights and lanterns.
The action of time is inevitable. But the wear and tear will be accentuated, especially if your vehicle is exposed to the weather and sunlight for a good part of the time. The polycarbonate lenses of the headlights and taillights can be fogged, slightly dry or even show small scratches and fine cracks. Find more here: best headlight restoration kit
The most worn lenses are not only unpleasant to the car's aesthetics, but lose functionality, because the beams of light emitted by headlights and lanterns have their amplitude hindered or partially reduced. The most expensive measure a driver can take in this situation is to purchase new pairs of headlights or taillights and replace the most exhausted items. Another solution is to look for a specialized vehicle cleaning workshop to revitalize the lenses, using special sanding and polishing wax.
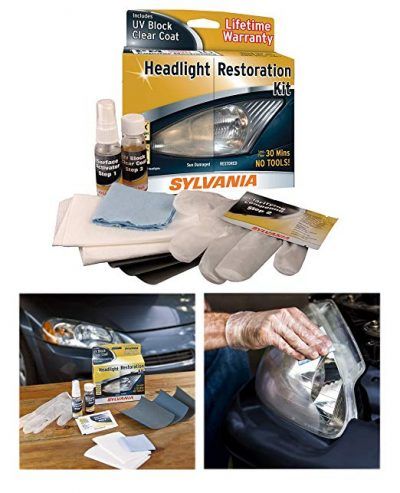
What to do to clean the lenses consumed by the action of time.
However, there are other, cheaper ways to deal with this problem. In that case, the driver will have to get his hands dirty. Don't worry, the task is not difficult. In the automotive market in general, in branch stores, or even in some supermarkets, several kits are available for shining headlights. They usually have flannels, sponges, polishing objects and lotions for a good aesthetic finish. These products also have precise handling instructions and the driver will have no problem understanding how everything works.
The bad consequences of having worn headlights and lanterns.
The action of time is inevitable. But the wear and tear will be accentuated, especially if your vehicle is exposed to the weather and sunlight for a good part of the time. The polycarbonate lenses of the headlights and taillights can be fogged, slightly dry or even show small scratches and fine cracks. Find more here: best headlight restoration kit
The most worn lenses are not only unpleasant to the car's aesthetics, but lose functionality, because the beams of light emitted by headlights and lanterns have their amplitude hindered or partially reduced. The most expensive measure a driver can take in this situation is to purchase new pairs of headlights or taillights and replace the most exhausted items. Another solution is to look for a specialized vehicle cleaning workshop to revitalize the lenses, using special sanding and polishing wax.
What to do to clean the lenses consumed by the action of time.
However, there are other, cheaper ways to deal with this problem. In that case, the driver will have to get his hands dirty. Don't worry, the task is not difficult. In the automotive market in general, in branch stores, or even in some supermarkets, several kits are available for shining headlights. They usually have flannels, sponges, polishing objects and lotions for a good aesthetic finish. These products also have precise handling instructions and the driver will have no problem understanding how everything works.
A homemade and even cheaper solution to lighten the lenses.
There is also a homemade solution, cheaper and easier to use. The driver will only need a tube of toothpaste, a soft flannel and a glass cleaner, the kind we found in the supermarket. If there are some sandpaper, a spray bottle and a roll of masking tape in the residence, even better.
First, the driver must isolate the car paint, using masking tape to wrap and separate the bodywork from the headlights and lanterns. This will ensure that, when working on plastic lenses, the paint is not affected or damaged. The plastic parts must be cleaned with a cloth so that they are well dried. If you have the sanding material, use it in straight lines, in one direction, across the surface of the lens.
Leave the sandpaper slightly moistened with plain water before applying it to the plastic object. If there are sandpaper of different weights, use the thicker ones first, with smoother movements, and then the thinner ones, applying greater pressure.
The sanding operation aims to soften or remove the scratches and grooves previously present in the polycarbonate, which will result in a more dull and apparently cloudy surface. But there is nothing to worry about. The tasks that follow will return the shine to the material.
The plastic must be dry again. Use a cloth for this and then spread the toothpaste evenly over the surface, evenly and with the help of another clean flannel. At this time, you can rub in a circular motion. You can repeat the application of the toothpaste, if necessary, increasing the transparency of the material a little more. Finally, apply the glass cleaner in the same way as with windows and glass in general in your home.
